Pages

Pages

Showing posts with label home decor. Show all posts

Saturday, September 23, 2017

Cheers to 3 years

A letter to you on your 3rd birthday.

Dear Griffin Boy,
You make life so special. You are joy embodied in a little boy. When you were 8 weeks old, our family went through some hard life changes. You were an angel. You slept through the night and woke with smiles every morning. You helped me press on in love. And you made my heart explode everyday with your sweetness. You've grown into your own little person. And we wrestle for who is in charge. We fight hard but we love harder. You bring me to the end of myself. And yet with your chubby hands on my face whispering 'i wuv you', I am undone. You've made me rely on God for wisdom and guidance and made me drop to my knees praying for patience. But I feel like the luckiest mom in the world that I'm the one that gets to love you. To guide you. To grow you. 
Cheers to 3 years, little boy. And many more to come. 
xoxo


Tuesday, July 25, 2017

Playroom Update


A few weeks ago I found a suuuuper smushed cereal bar in the shag rug I had in here for the boys' playroom. Like, had to cut it out of the rug bad. And then a few days after that, the boys started using their train table as a ramp. Not for their trains or cars, for themselves.
That's all I needed to see to know it was time for a change in here.

So, first order of business was maximize their space for how they actual use it. 

 Since the train table was no longer serving it's purpose, it got put into storage and opened up a ton more room for rearranging. I moved their coloring table to a more accessible spot and put up a cork board for them to proudly display their work.

We also put in a reading corner. 
And my husband whipped up this cute little bench for the boys to sit on. 


I also found this vintage phone for $5 and knew the boys would get a kick out of it.

The conversations I overhear on this phone are hilarious. 

We made some more room for make believe and for decorations that remind us 
of our first home in Virigina. 
 

 But honestly the highlight of our playroom upgrade is this Lorena Canals machine washable rug.
You read that correctly, MACHINE WASHABLE! This rug will fit in a standard washer and dryer. If that is not life-changing for a kids' space, I don't know what is. It is so liberating to just throw this sucker in the washing machine and not lug out the vacuum.

Also high on style and so on trend with those cute braided tassels.
An added bonus because this is a room I share with the boys. 
My office area is the other half of this room (maybe one day I'll show you when it's not a wreck), so it's a win-win in our shared space!
Handmade and with all natural dyes, we opted for the coordinating pom-pom throw as well with all the same great easy washing qualities. It's already been through the ringer on fort-building night.

I've been super happy with how well it's withstood my boys' most highly trafficked area. 
 Because let's be honest, this room mostly looks like this everyday.


And like this - with someone's bum in time-out. ;)

We're finding our way in this shared space and I'm so happy to say I won't be cutting cereal bar out of any rugs any time soon! 


For more info on Lorena Canals products, visit their site. 
Disclaimer: I received Lorena Canals products for review purposes but all opinions are my own.


Friday, February 17, 2017

Galantines Brunch + Printable Cards

Galantines Day is one made up holiday that I definitely celebrate.
Because good girlfriends are the stuff of life.

I started doing throwing a little Galentines Day brunch several years ago when I lived in Virginia 
and for me, it was the perfect way to celebrate the girls who had 
invested so much in my life by their friendship. I really encourage you to do this. 
Not Galentines, although that's a perfect excuse, but just celebrate the people who invest
in you. Good friends are among the best things in life and deserve that celebration.


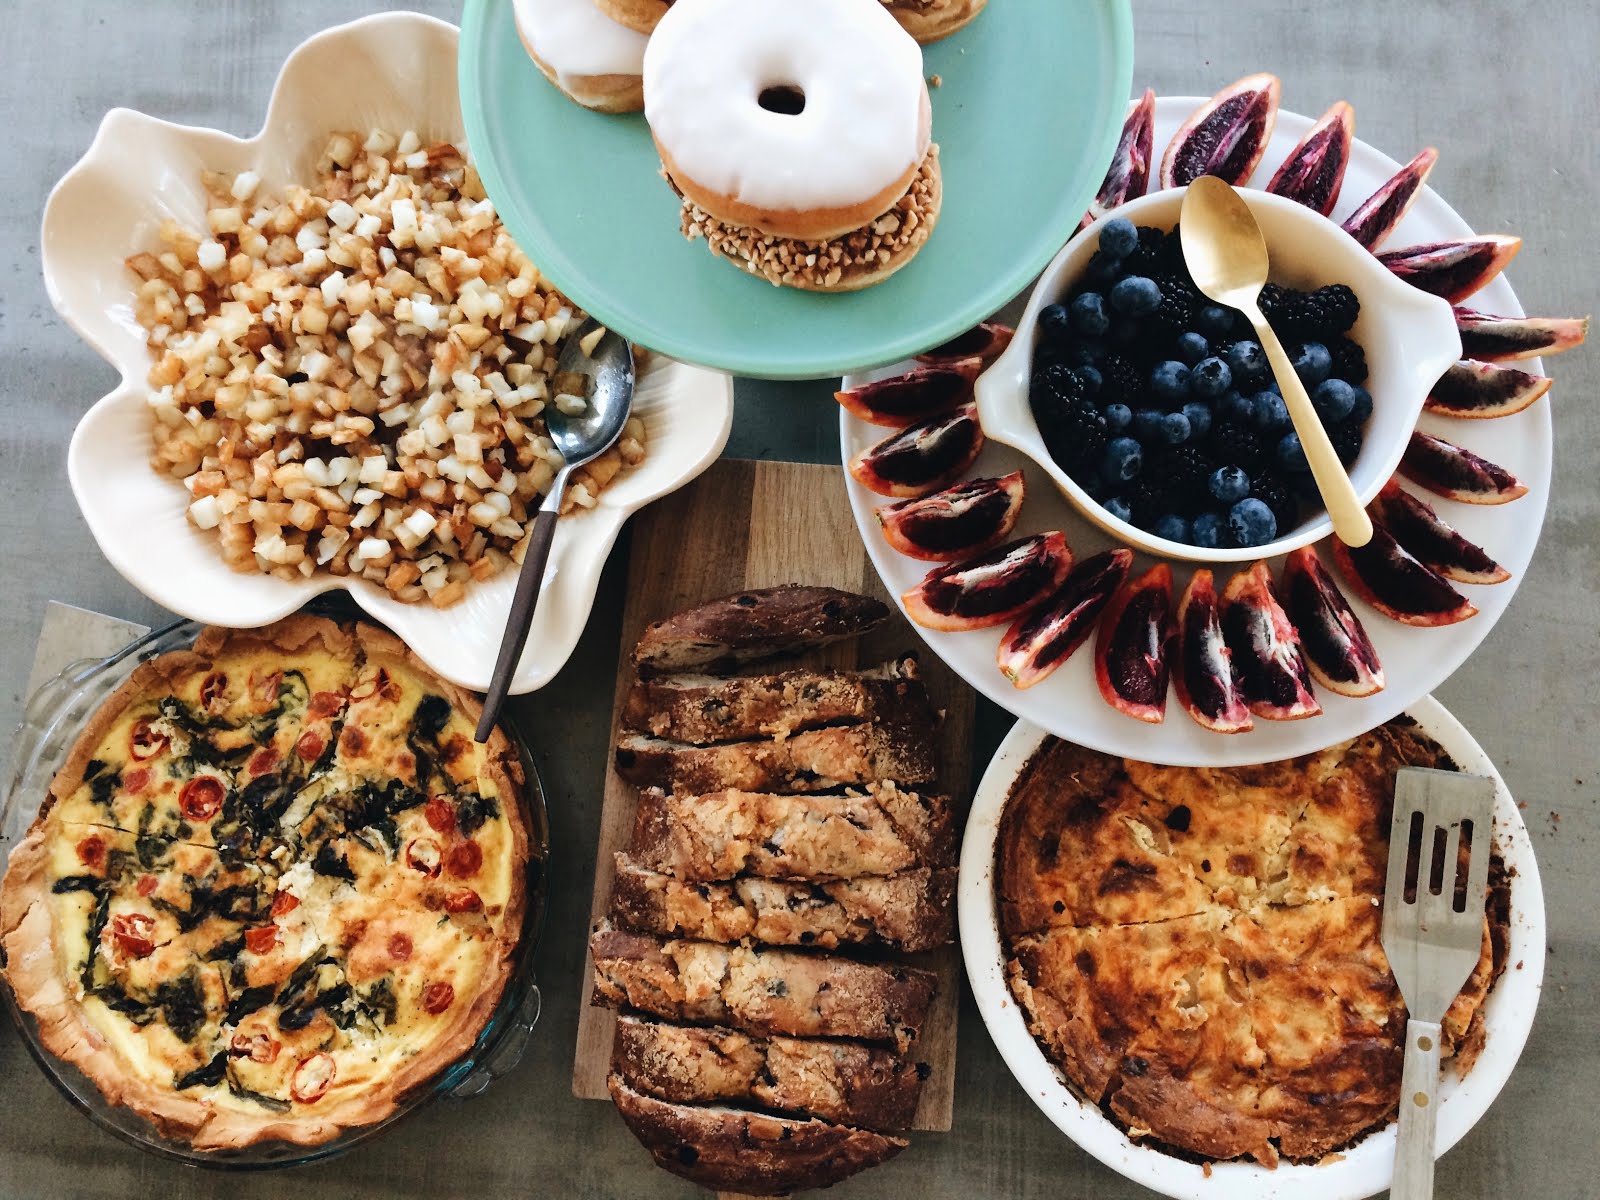
For me the food is the hardest part. So I made it easy on  myself and made stuff that I know how to make and make well. Two types of quiche and hash browns. And bread and fruit are always an easy add on. 

Making these Pink Grapefruit Mimosas was maybe my best decision. So delish.
The recipe is super simple and I just made it up so just go with it.
Equal parts: 
-pink grapefruit juice 
- and champagne 
and then blood orange slice and blueberries for garnish!
(You can always sub grapefruit flavored sparkling water for anyone who doesn't prefer champagne)

I think simple and beautiful is the way to go. 
Pull out a table cloth, the real napkins, put out place settings and maybe grab some fresh flowers
and you'll have yourself a well set table!


I've even made it easy for you and I've included my placards here as a free printable download
I like to do the printables for you guys as a little thank you for all the ways you support my brand and my online shop. So, enjoy and celebrate the people in your life! These would even make cute little encouragement cards to send in the mail! 
xoxo

Wednesday, January 11, 2017

Kitchen Counters on a Budget - Concrete Counters

When we were looking at houses online, I skimmed right over our house at first because I was like 'woof, that kitchen.'


But eventually I started to dream and imagine it not yellow.
And then we set out to do the work. Which started with painting. We used the same pretty light gray that we chose for our living room and hallways. 

And that helped a ton. But then we were left with the retro boomerang counters.
Which were kinda fun and made us feel like we were really in a diner when when
would sit in the booth but they just weren't our style.

So, Josh and I went and priced out counters.
And promptly came home and started researching alternate routes. 
Because the cheapest option was gonna cost about $1500 just for our small space and we weren't even in love with it.
So when I saw Young House Love's concrete counters, I showed Josh the tutorial and asked
 him what he thought. It was by far our cheapest option at only about $150 all in with materials but
it would definitely require the most man-hours on his part.
But that has never scared him.

Since the kitchen would be unusable for several days, I took the boys and headed to NY to stay with my best friend so that Josh could get the work done without worrying about us in the way and the boys getting into stuff! 
He followed the YHL tutorial using the feathering concrete.
So if you're wanting to try your hand at this, I suggest following their detailed and step by step tutorial because that's what we did.
We did take the extra step and remove the appliances and sink while doing the work though.


The sanding was the messiest part of the project.


And the drying times in between coats of concrete and then coats of sealer took the longest.

And when we got home the sealer was still drying, so we erred on the side of caution 
and didn't set anything on them for several days.


But once they were dry, I was beyond thrilled with how they looked!

The sealer gave them a nice sheen that made them look even more like a stone.


I can't tell you how much more I like this kitchen without yellow walls and blue counters.


After several months of using them, they have held up really well.
I chalk that up to the good job Josh did on them.
We do have some discolored spots behind our sink where it gets wet a lot and
also where I sit our butter dish, it seems some of the oils have seeped through.
But because of the variated look of the concrete anyways, it blends really well and even adds to the character and charm. 


And we've gotten to enjoy so many good times and great food in our feels-like-new kitchen!


Overall, we are super happy with our decision, they way they look, 
and the money that's still in our pockets. :)

Next up, new kitchen flooring!