Pages

Pages

Monday, February 21, 2011

How to make a personalized gift for your favorite little person

Step one: Go to target (or your store of choice) and buy a gender and size appropriate onesie.


Step two: Go to Michaels.com and download a 40% off coupon. Go to Michael’s and purchase iron-on letters on the cheap using your coupon. While you’re there buy a scrap of felt in your color of choice for 30 cents.


Step three: Come home, cut out a heart or other embellishment of your choice out of your felt.


Step four: Arrange your letters to make a personalized message and ensure your spacing is correct.

Step five: Iron on the letters. (I kept mine in place and just ironed them one at a time so I was sure they wouldn’t move on me.)


Step six: Use simple stitching to apply your embellishment.


Step seven: Admire your completed personalized onesie.


Step eight: Gift it to your favorite little person.


Step nine: Snuggle your favorite little person in their new onesie proclaiming their love for you. J

Tuesday, February 15, 2011

goodwill hunting & sewing treasures

I finally found a purpose for this funky little bird i found not too long ago at a thrift store. It has a hole in it so i'm not sure if it's supposed to be a planter or something, but I've decided to make it into a pincushion!


All I needed to do was to sew a piece that could be stuffed with batting and was big enough to cover the hole. So, I sewed two squares, right sides together, on three sides.

Normally, for the last side, I would hand stitch it to give it a polished look, but for this project, I knew the unfinished side would not be seen anyways, so once the three sides were sewn, i stuffed it and sewed the final side using the machine.

In order to keep the pincushion pushed up through the hole, I stuffed the empty space with newspaper.

Now, I have a permanent fixture holding my pins and my funky little bird is now happy in his newfound purpose. He kinda makes me want to sew more.

In another one of my thrifting adventures, I found this old, beat up box with a $2 price tag. This is what was inside that old, beat up box:

As if the price weren't enough to sell me, I was totally sold by the wooden spools and the fact that the thread was already color coordinated.

Dear beautiful old thread, you had me at hello.

Now I'm really gonna have to sew more.

how i loved my valentine


heart-shaped foods. hobo eggs, as josh calls them.

a lovely meal together. they say the way to a man's heart is through his stomach - i think it's true.

i try to be creative in my gift-giving. and as i pondered what to give my valentine, i remembered the book we read together before we got married, The Five Love Languages by Gary Chapman. If you haven't read it with your significant other, you should. I found it to be very helpful in understanding how Josh feels most loved. And because I know his love language is 'words of affirmation', I decided to give him a gift that keeps on giving. It's a mason jar filled with all the things I love about him, big and small. He loved it - the love language thing is legit. He decided to take it to work and pull one out when he needs a little extra encouragement during the day.
hope you all found fun ways to show the people in your life you love them!

Friday, February 11, 2011

labor of love

If you know me at all, you probably know that I can often be found 'keeping my eye out' for something I would like to purchase. When I say I'm 'keeping my eye out' for something what I really mean is, "I haven't been able to find it for the price I want to pay." Such was the case for the 8-10 person dining table I couldn't seem to find and had been 'keeping my eye out' for since we moved into our new house some 9 months ago. This meant scouring craigslist, frequent trips to goodwill and other various thrift stores, and looking for furniture store sales. No dice. Part of the problem was that I had lofty ideas of this Pottery Barn beauty with the equally lofty price tag of $1500.

Bennett Dining Table, 86 x 35"

Then Christmas came and Josh was gifted with a new miter saw and a drill press to add to his growing tool collection. He knew of my frustration with not being able to find a large dining table in our price range and joked that now he could build me one. The idea was born. Now, my husband is super handy, but I never envisioned him a carpenter. But off he went looking for farmhouse table plans on the internet to see if he could figure out how to build me one. If you're familiar with the DIY world at all, then I'm sure you've heard of Ana White. She is a builder extraordinaire....and she provides building plans....for a farmhouse table! Now her farmhouse table plans were a little smaller than we wanted, but with a few recalculations, Josh had our table in the works.

I'm not about to do a step-by-step, you can visit Ana for that, but here are a few highlights of our process:

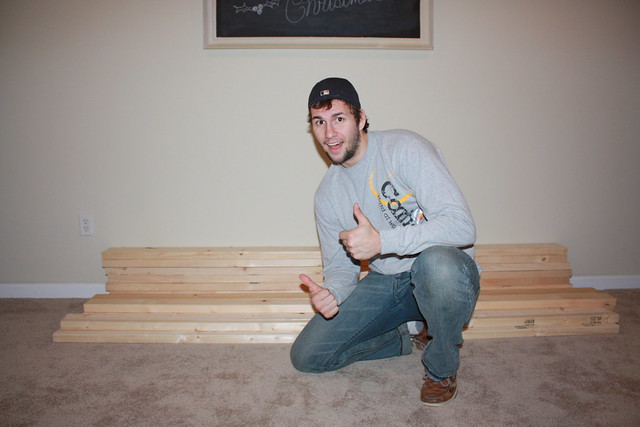
Here is Josh feeling excited about his wood purchase and ready to start the table.

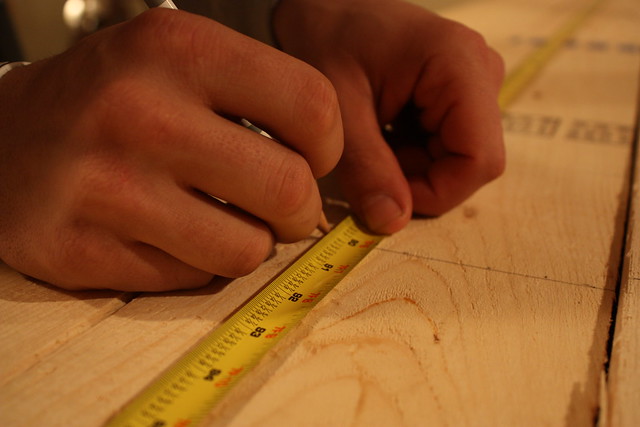
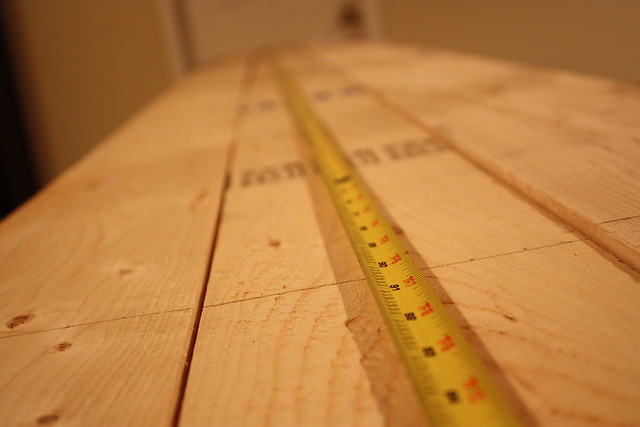
Measuring before making cuts. Josh's words to build by: measure twice, cut once.


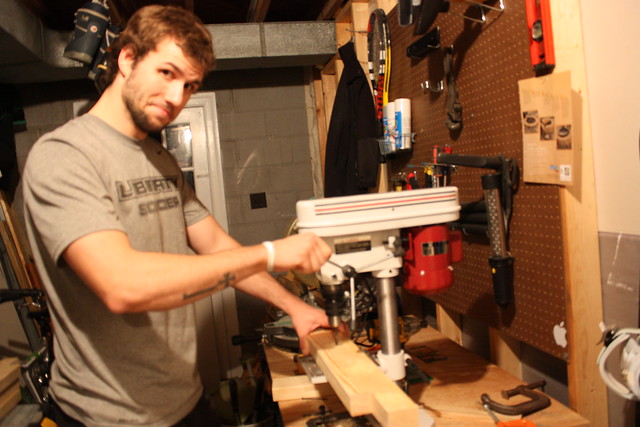
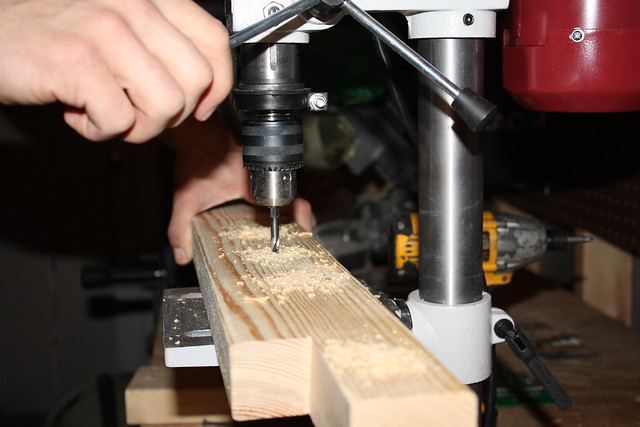
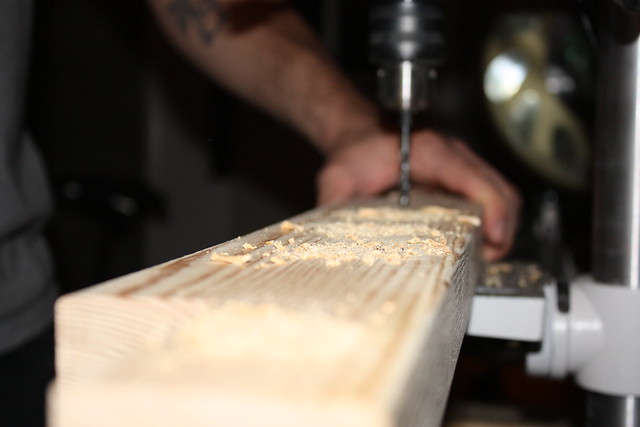
After all the cuts were done, Josh used his new drill press to make the screw holes.


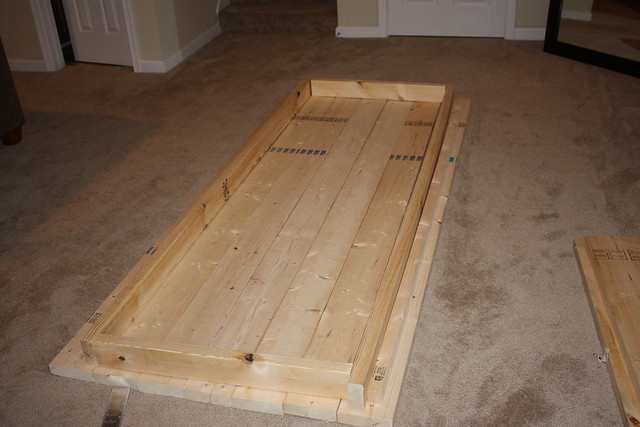
Once that was done, it was simple piecing together with screws. Voila - the frame!

Here he is making sure his boards are straight. You should have seen this kid at Lowes trying to find straight boards, he is definitely a perfectionist in his work.

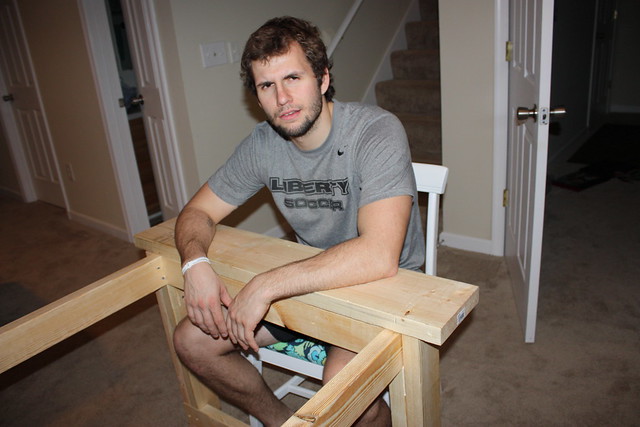
This is his "Seriously, Shelb?" face.
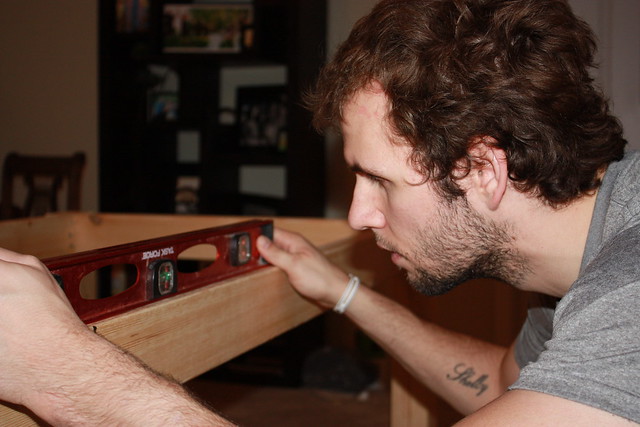
I was being persistent that I wanted someone to be able to sit on each end and I wasn't sure the breadboards would hang off enough. This is him proving me wrong.

A glimpse of the top-to-be.

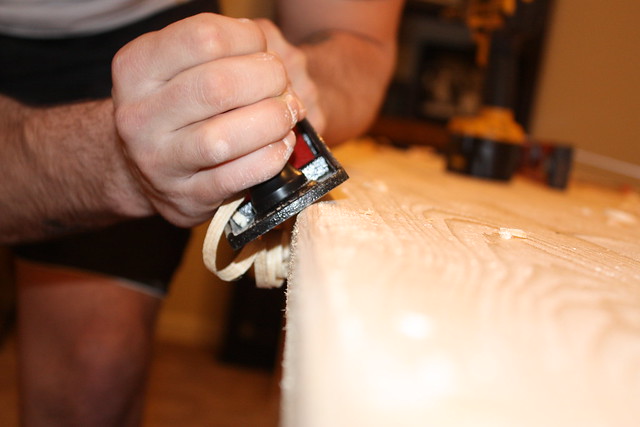
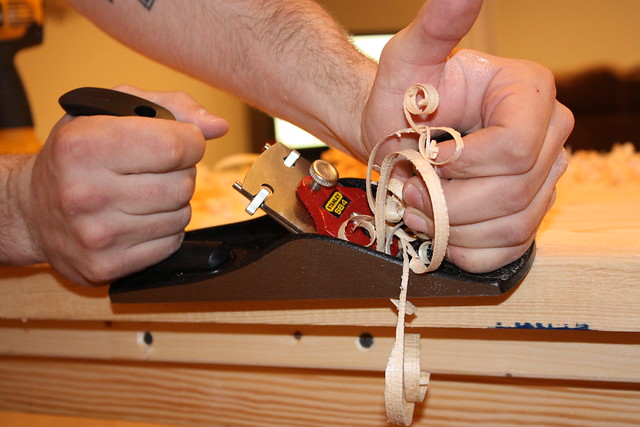
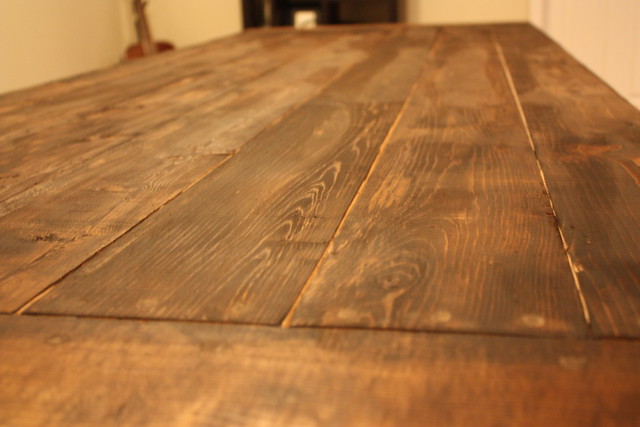
Once assembled, Josh planed the entire top to give it that rustic, this-has-been-in-our-family-for-years antique look.

Wooden curly-q's :)

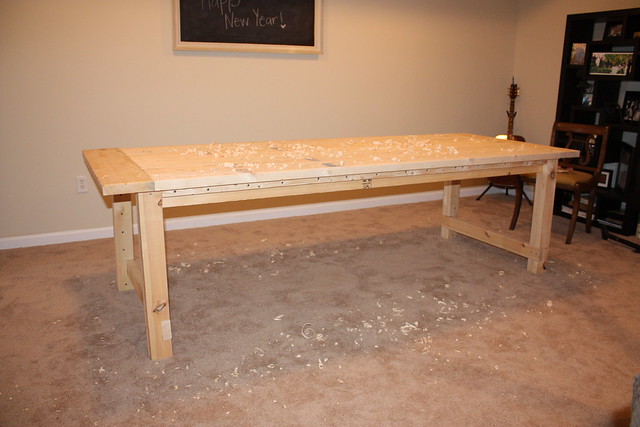
Assembled and planed.

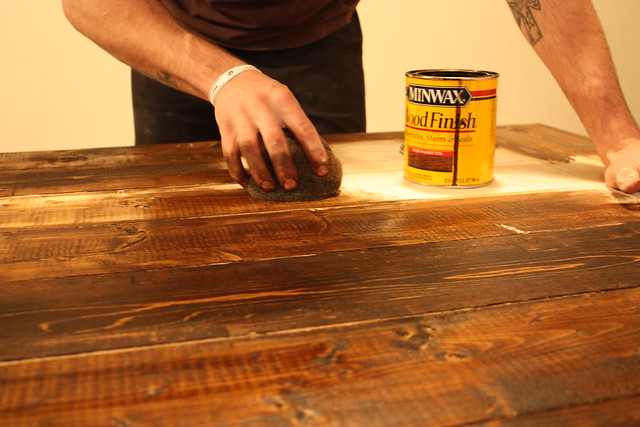
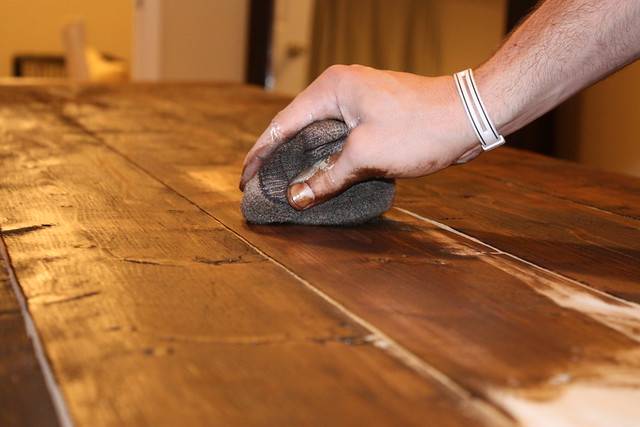
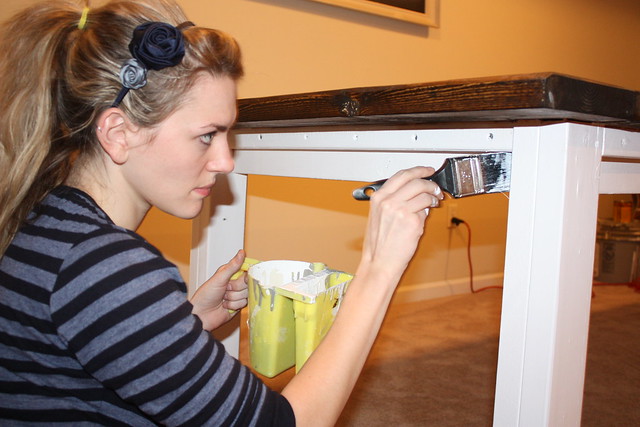
Now, for the stain. We decided we wanted a dark top and a white painted bottom for that antique look we were going for. Josh was in charge of stain.

I love how the character in each piece of wood came out as the stain went on. You could have convinced me they were reclaimed floor boards.


I was in charge of painting. Two coats.


While I was ready to be finished, "We don't need to paint or stain the underside, no one is going to be looking under there", my 'do it right the first time' husband insisted on staining the underside. "It definitely looks more polished", I relented.

My finishing touches on the table using the metal stamping kit I found in my stocking this Christmas.

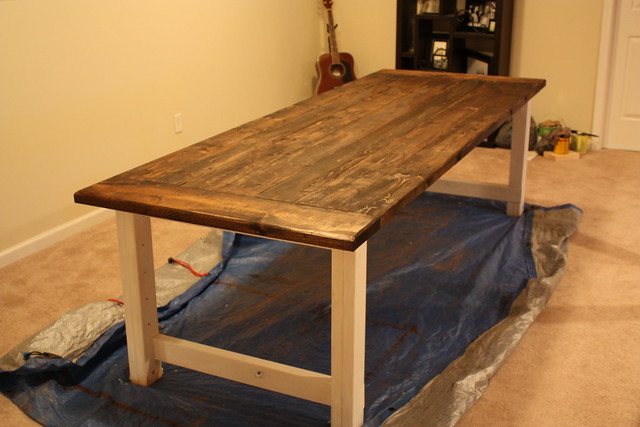
Our finished product. Pottery Barn who?

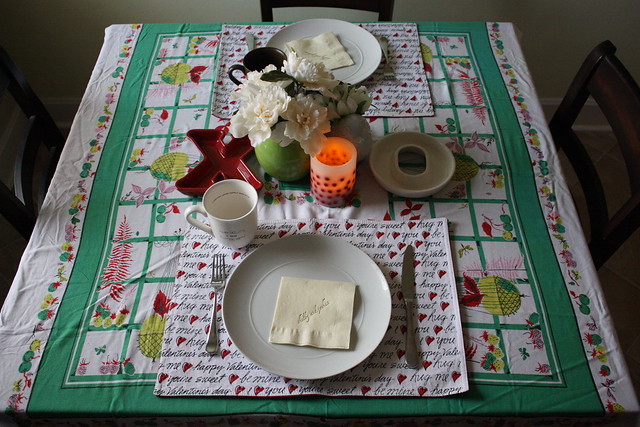
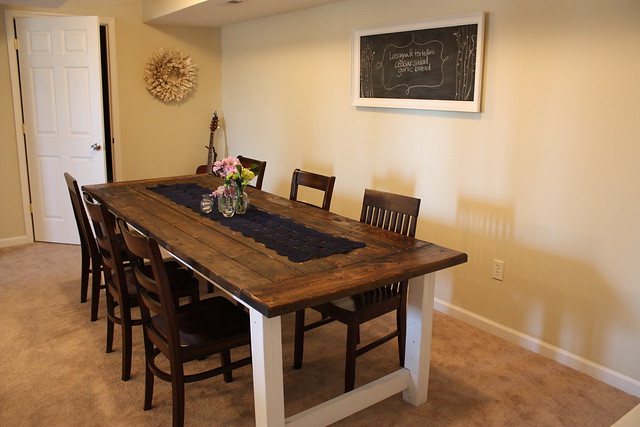
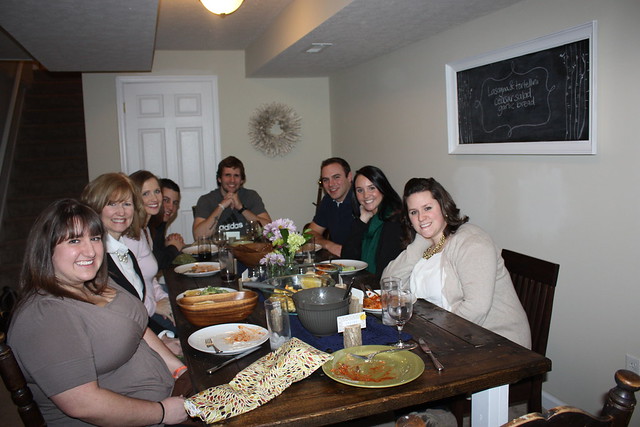
The final step was to prepare the table to fulfill its purpose - a dinner party.

Put out a fresh flower centerpiece....

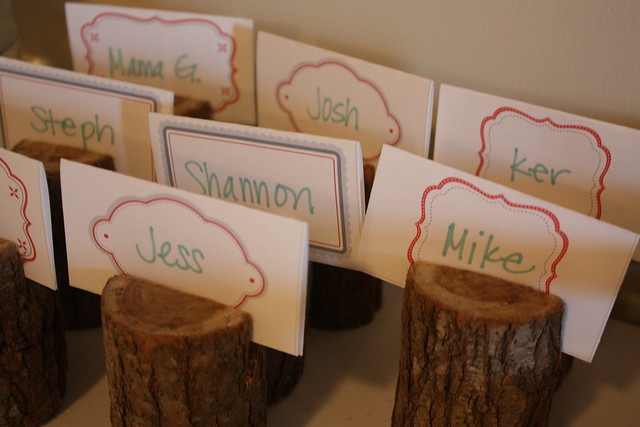
invite people you love...

...enjoy dinner with friends on your new table!

And I just have to gush about my husband, he built this table in a little over a week, and it is way more beautiful and well-built than anything I could have ever found at Pottery Barn (and was 1/20th the price!). I am so proud of him. It was a true labor of love.


*Check these out if you're wondering about the book wreath or chalkboard pictured above.


This project has been featured!


Also, shared at:
Somewhat SimpleThrifty Decor Chick

Monday, February 7, 2011

inspired by: design sponge

when i think about what inspired me to start a blog of my own, i think about when i first discovered what a blog was. the first blog that i stumbled upon some 2 years ago was design sponge. i can't remember what led me there, but i remember being enthralled by everything they do. i also remember bookmarking one of their diy crafts for making a tree topper using Once Wed's Fabric Poms tutorial that first day I discovered them.

Fast forward to this Christmas, I actually got around to making this tree topper and I absolutely love it! So untraditional and fun!


another project found over on design sponge is their recycled toilet paper roll wall art
wall art_eco kids craft04


which inspired me to make one of my own for my office

design sponge is one of my daily reads and i particularly love the submitted before & afters which help me see potential in otherwise helpless spaces and furniture.

so, thanks for all the inspiration, design sponge

keep your eyes peeled for more 'inspired by' posts where i highlight my favorite, inspirational blogs.

Friday, February 4, 2011

the king of the castle & the dirty rascal

this was my view out the window today. my little dog had wrapped himself around the bench and could go nowhere but up. i watched him for a bit, looking around and surveying the land and i couldn't help but think he considered himself the king of the castle.


upon closer inspection, i found out he must have been occupying himself in the mud.

my husband and i probably spend the better part of half an hour each day cleaning off mud from his paws from his trips outside...and yet somehow my floors are still stained with Virginia clay.

but it's nothing a good bath can't fix.

does anyone feel my pain with the clay-stained floors? what funny things do your animals do? do tell.